
Introduction to Kyocera Printer
Kyocera Corporation is a multinational electronics and ceramics manufacturer based in Japan. It has been in the printing business for over 25 years and is renowned for producing high-quality printers that are reliable and efficient. The Kyocera printers use advanced ceramics technology that has enabled them to deliver superior print quality that is unmatched in the industry. The company has a wide range of printers designed for various printing needs, from small home offices to large corporations.
What is Kyocera Printer?
A Kyocera printer is a printing device that uses advanced ceramics technology to produce high-quality prints that are durable and long-lasting. The printers are designed to provide reliable performance and low maintenance costs, making them an ideal choice for businesses that require efficient and cost-effective printing solutions. The printers are available in different models, each designed for different printing needs.
Why is Kyocera Printer Important?
The Kyocera printer is important because it offers businesses a cost-effective and reliable printing solution that enables them to meet their printing needs. The printers are designed to produce high-quality prints that are sharp and clear, ensuring that businesses can create professional documents, marketing materials, and reports that look professional and attractive. The advanced ceramics technology used by Kyocera ensures that the printers have a long lifespan, reducing the need for costly maintenance and replacement.
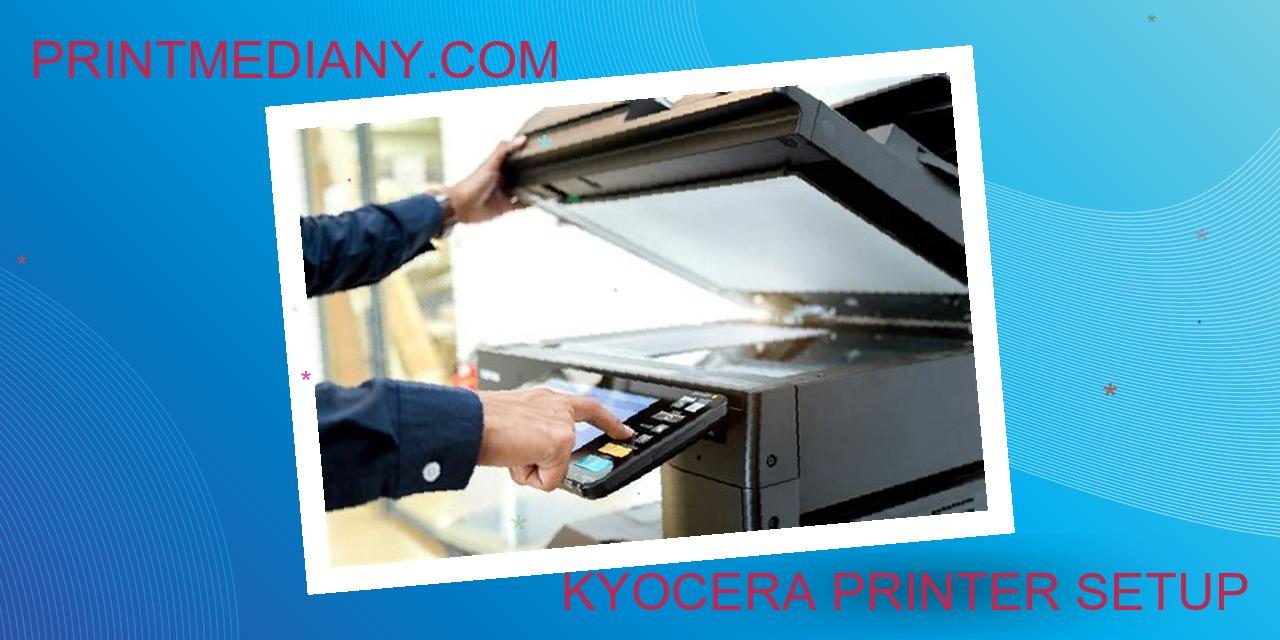
What is the Setup Process of Kyocera Printer?
The setup process for Kyocera printers may vary depending on the model. However, the general process involves connecting the printer to the computer or network and installing the necessary drivers and software. A quick and easy way to set up the printer is to follow the instructions provided in the user manual or download the setup guide from the Kyocera website. In most cases, the setup process is straightforward and can be completed in a matter of minutes.
Unboxing Kyocera Printer: A Step-by-Step Guide
If you’ve recently purchased a Kyocera printer, congratulations! You’ve invested in a reliable and high-quality printer that can make your printing tasks a breeze. However, before you can start using your printer, you need to unbox it first. In this guide, we’ll walk you through the process of unboxing your Kyocera printer, step-by-step.
What’s in the Box?
Before you start unpacking your printer, it’s important to know what to expect in the box. Here are the items that typically come with a Kyocera printer:
- The Kyocera printer
- The power cord
- The toner cartridge(s)
- The user manual
- The installation CD/DVD (if applicable)
Read more:
How to Safely Unpack the Printer?
Now that you know what’s inside the box, you can start unpacking your printer. Here are the steps to do it safely:
- Place the box on a flat surface and open the top flaps.
- Carefully lift the printer out of the box and place it on a stable surface.
- Remove any tape or protective material that’s on the printer.
- Remove the toner cartridge(s) from their packaging and install them in the printer, following the instructions in the user manual.
- Connect the power cord to the printer and plug it into a power outlet.
- If applicable, insert the installation CD/DVD into your computer’s CD/DVD drive and follow the installation instructions.
How to Check the Completeness of the Package?
After you’ve unpacked your printer, it’s important to check the completeness of the package to make sure you’ve received all the items that should come with your printer. Here’s how to do it:
- Check if you have received all the items listed above.
- Inspect the printer and its components to make sure there are no visible damages or defects.
- If you notice any missing items or damages, contact Kyocera’s customer support immediately.
How to Dispose of the Packaging Materials?
Lastly, you need to dispose of the packaging materials properly. Here are some tips:
- Recycle any cardboard or paper materials.
- Reuse any plastic or foam materials for other purposes, if possible.
- Dispose of any hazardous materials, such as batteries or toner cartridges, according to the local regulations.
And that’s it! You’re now ready to start using your Kyocera printer.
Preparing for Setup: A Comprehensive Guide
Setting up a printer can be a daunting task for many, but with the right guidance, it can be a breeze. Before you begin, it is crucial to have all the necessary components to ensure a successful setup. This includes the printer, power cable, USB cable (if required), and toner cartridge. In this article, we will guide you through the process of setting up your printer step by step.
How to Find an Appropriate Location for the Printer?
The first step in setting up your printer is finding a suitable location for it. It is important to place the printer in a well-ventilated area that is easily accessible. The printer should also be placed on a flat surface that can support its weight. Avoid placing the printer in direct sunlight or near sources of heat or moisture.
How to Connect the Printer to the Power Source?
Once you have found the ideal location for your printer, it is time to connect the printer to the power source. Attach the power cable to the printer and plug it into an electrical outlet. Turn on the printer and ensure that the power indicator light is on.
How to Install the Toner Cartridge?
The next step in setting up your printer is installing the toner cartridge. Open the front cover of the printer and carefully remove the toner cartridge from its packaging. Gently shake the cartridge to distribute the toner evenly before inserting it into the printer. Make sure the cartridge is securely in place before closing the front cover of the printer.
How to Load Paper into the Paper Tray?
The final step in setting up your printer is loading paper into the paper tray. Open the paper tray and adjust the paper guides to fit the size of the paper you will be using. Place the paper in the tray, making sure it is aligned with the guides. Close the paper tray and adjust the paper output tray to support the paper as it comes out of the printer.
By following these simple steps, you can set up your printer in no time and start printing. Remember to consult your printer manual for specific setup instructions as they may vary depending on the make and model of your printer.
Connecting to a Network: Tips for a Successful Setup
Connecting your printer to a network is one of the most important steps in ensuring that you can print from any device in your home or office. Here are some tips and tricks to make sure your printer is connected to the network successfully.
How to Check the Network Settings of the Printer?
Before connecting your printer to the network, it’s important to check the network settings to ensure that it’s compatible with your network. You can usually find the network settings in the printer’s control panel menu or by printing a network configuration page. This page will provide you with an overview of the printer’s current network settings, including the IP address, subnet mask, and gateway.
How to Connect the Printer to a Wired Network?
If you’re connecting your printer to a wired network, you’ll need an Ethernet cable. First, obtain the IP address by printing a network configuration page or checking the control panel menu. Next, connect the printer to the network via Ethernet cable and enter the IP address when prompted during the setup process. Once the setup is complete, you should be able to print from any device connected to the network.
How to Connect the Printer to a Wireless Network?
Connecting your printer to a wireless network is a little more complicated than connecting it to a wired network. First, make sure your wireless network is set up and working correctly. Follow the printer’s instructions for connecting to the wireless network. You’ll usually need to enter the network name and password. Once the printer is connected to the wireless network, you should be able to print wirelessly from any device connected to the same network.
How to Check the Connection Status of the Printer?
It’s important to check the connection status of your printer regularly to ensure that it’s connected to the network and working correctly. This can usually be done by printing a network configuration page or checking the control panel menu. If you notice any issues with the connection, such as a low signal strength or lost connection, it’s important to troubleshoot the issue as soon as possible to ensure that your printer continues to work correctly.
By following these tips, you can ensure that your printer is connected to the network and working correctly for all your printing needs.
How to Install Drivers and Software for your Printer
If you have recently purchased a new printer or need to reinstall your current one, it’s important to install the correct drivers and software to ensure that it will function properly. Here is a step-by-step guide on how to download and install the necessary drivers and software for your printer.
How to Download and Install the Printer Driver?
The first thing you need to do is to download the appropriate printer driver from the manufacturer’s website. Make sure that you select the correct driver for your operating system and printer model. Once you have downloaded the driver, follow the instructions to install it on your computer. You may need to restart your computer after the installation is complete.
How to Install the Printer Software?
In addition to the printer driver, you will also need to install the printer software. This software allows you to control various printer functions, such as scanning, copying, and faxing. The software can usually be found on the manufacturer’s website or on the CD that came with your printer. Follow the same process as with the driver to install the software on your computer.
How to Configure the Printer Settings through the Software?
Once you have installed the printer driver and software, you can use the software to adjust various settings, such as print quality, paper size, and page orientation. Make sure to consult the printer’s manual for a complete list of available settings and instructions on how to change them.
How to Troubleshoot Common Driver or Software Issues?
If you encounter any issues while installing or using the printer driver or software, the first step is to consult the manufacturer’s website or manual for troubleshooting tips. If the issue persists, you may need to uninstall and reinstall the driver and software or contact the manufacturer’s customer support for further assistance.
By following these steps, you should be able to easily download and install the necessary drivers and software for your printer, as well as configure it to meet your specific needs.
Printing from Devices: A Guide
In today’s digital age, printing important documents and photos has become an essential aspect of our daily lives. Whether it’s from a desktop computer, laptop, or mobile device, printing has become a seamless process, thanks to advancements in technology. This guide will provide you with a step-by-step process on how to print from various devices and how to troubleshoot common printing issues.
How to Print from Windows?
Printing from Windows is a straightforward process. Firstly, ensure that your printer is connected to your computer via USB or Wi-Fi. Next, select the document or photo that you want to print and click on the print icon. You can customize your print settings, such as the number of copies, double-sided printing, and color preferences. Finally, select your printer and hit the print button.
How to Print from Mac?
Printing from a Mac computer is also an easy process. Firstly, make sure your printer is connected to your Mac via Wi-Fi or USB. Next, select the file that you want to print and click on the file menu. From there, select the print option, and a new window will appear. You can change your print settings, such as paper size, quality, and orientation. Finally, click on the print button to complete the process.
How to Print from Mobile Devices?
Printing from mobile devices has become more accessible in recent years. Most modern printers come with a built-in wireless feature that allows you to print directly from your mobile device. Firstly, ensure that your mobile device and printer are connected to the same Wi-Fi network. Next, download the printer’s app on your mobile device and select the file you wish to print. Customize your print settings, such as paper size, color, and quality. Finally, click on the print button to start printing.
How to Troubleshoot Common Printing Issues?
If you encounter issues while printing, there are a few troubleshooting techniques you can try. Firstly, ensure that your printer is turned on and connected to your device. Secondly, check your ink or toner levels. If your ink or toner levels are low, replace them before attempting to print. If your printer is not printing correctly, check for any paper jams or debris that may be stuck in the printer. Finally, update your printer drivers to ensure compatibility with your device.
By following these steps, you can ensure that your printing experience is seamless and trouble-free.
Maintenance and Troubleshooting for Kyocera Printers
Maintenance and Troubleshooting for Kyocera Printers
Printers are essential tools in any office or personal workspace. However, like any other machine, they require regular maintenance and troubleshooting to function properly. Regular maintenance can help prolong the printer’s lifespan, improve its print quality, and prevent costly repairs. Troubleshooting, on the other hand, can help diagnose and solve common printer problems, such as paper jams or connectivity issues.
How to Clean the Printer?
Cleaning your printer regularly can help prevent dust buildup, which can affect the quality of your prints. To clean your Kyocera printer, follow these steps:
1. Turn off the printer and unplug it from the power source.
2. Open the printer cover and remove the toner cartridge.
3. Use a clean, dry cloth to wipe the outside of the printer, including the paper trays and the interior.
4. Use a can of compressed air to blow any dust or debris from the printer’s components, such as the rollers and the print head.
5. Reinsert the toner cartridge and close the printer cover.
6. Plug the printer back in and turn it on.
How to Replace the Toner Cartridge?
The toner cartridge is a crucial component of your printer. It contains the toner powder, which is used to create the text and images on your prints. Here’s how to replace the toner cartridge:
1. Turn off the printer and unplug it from the power source.
2. Open the printer cover and remove the old toner cartridge.
3. Unpack the new toner cartridge from its packaging.
4. Gently shake the cartridge to distribute the toner powder evenly.
5. Align the cartridge with the printer’s slot and insert it in.
6. Close the printer cover.
7. Plug the printer back in and turn it on.
How to Troubleshoot Paper Jams?
Paper jams are a common printer problem that can be caused by various reasons, such as using incorrect paper or overfilling the paper tray. Here’s how to troubleshoot paper jams:
1. Turn off the printer and unplug it from the power source.
2. Open the printer cover and remove the paper jammed in the printer.
3. Check the paper tray and remove any misaligned or stuck sheets.
4. Fan out the remaining sheets to prevent them from sticking together.
5. Reload the paper tray with the correct type and amount of paper.
6. Close the printer cover.
7. Plug the printer back in and turn it on.
How to Troubleshoot Connectivity Issues?
Connectivity issues can prevent your printer from communicating with your computer or network. Here are some troubleshooting steps to resolve connectivity issues:
1. Check the printer’s connection to the computer or network.
2. Restart the printer and the computer or network device.
3. Verify that the printer driver is up to date.
4. Reset the printer’s network settings.
5. Check the firewall or antivirus software settings to allow printer communication.
6. Contact Kyocera’s technical support for further assistance.
Unlocking the Advanced Features of Kyocera Printers
When it comes to reliable and efficient printing, Kyocera is a brand that is sure to deliver. While its printers can already offer high-quality printing, reliable connectivity, and seamless compatibility with various devices and systems, their advanced features make them even more powerful tools for any workplace. Let’s explore some of the additional features that Kyocera printers offer and learn how to use them to make your work processes faster and more efficient.
What are the advanced features of the Kyocera printer?
Kyocera printers offer a broad range of advanced features that can help you streamline your printing process and maximize your productivity. One of them is the ability to print large volumes of documents quickly, thanks to their high-speed processors and fast printing capabilities. Kyocera printers also support duplex printing, which saves paper and reduces waste. Additionally, they come with advanced security and accounting features that enable you to monitor and manage your printing activities better.
How to use the Scan-to-Email or Scan-to-FTP feature?
The Scan-to-Email or Scan-to-FTP feature of Kyocera printers enables you to scan documents directly to your email or an FTP server with just a few clicks. To use this feature, you first need to set up the printer’s email or FTP server settings by accessing the device’s web interface. Once you have configured the settings, you can select the Scan-to-Email or Scan-to-FTP option on the printer’s control panel, and the printer will automatically send the scanned document to your email or FTP server.
How to use the duplex printing or booklet feature?
To use the duplex printing feature of your Kyocera printer, you need to select the double-sided printing option from the print settings. This will allow the printer to automatically print on both sides of the paper, reducing paper consumption and making printing more eco-friendly. On the other hand, the booklet feature enables you to create booklets easily by printing multiple pages on a single sheet of paper. This feature is convenient for printing brochures, pamphlets, or booklets with up to 16 pages.
How to use the security and accounting features?
Kyocera printers come with security and accounting features that allow you to set up user authentication, device access control, and user activity tracking. To access these features, you need to log in to the printer’s web interface and navigate to the security and accounting settings. From there, you can set up user authentication, restrict access to certain device features, and track user activity, such as the number of prints, copies, scans, or faxes made by each user.
In conclusion, Kyocera printers have a wealth of advanced features that can help you streamline your printing processes, improve your productivity, and save time and money. By taking advantage of these features and learning how to use them correctly, you will be able to take your printing to the next level and achieve better results in your work.
Frequently Asked Questions about Kyocera Printer Setup
Setting up a Kyocera printer can be confusing, especially if you’re using one for the first time. Even though Kyocera printers are renowned for their quality and durability, they can still have some occasional problems. Here are some frequently asked questions that can help you get the most out of your Kyocera printer.
What should I do if the printer does not turn on?
Whenever your Kyocera printer does not turn on, the first thing to check is the power source. Make sure the printer is plugged into a working outlet, the outlet is receiving power, and the cord is not damaged in any way. If you are still experiencing issues, try unplugging the printer and plugging it back in. It can also be worth checking to ensure there are no paper jams or that there are no cartridges out of place.
Why is the printer printing blank pages?
One reason you might be experiencing this issue may be because of low ink levels or toner. Ensure that there are no empty cartridges and that there is enough ink left. Check to see if the cartridges are correctly installed and that no toner leaks. Another possibility could be dirty or clogged nozzles, which can impact printing quality. An excellent way to remedy this situation is to use a cleaning kit or have a technician clean the printer.
How can I improve the print quality?
Improving the print quality of a Kyocera printer can be relatively simple. By adjusting the printer’s resolution settings, you can significantly improve the print quality. It is essential to use high-quality paper as well. If you’re printing important documents or images, you may want to consider using high-resolution settings or switching to glossy paper for best results.
How do I update the printer firmware?
Updating the firmware of a Kyocera printer is a relatively straightforward process. Begin by identifying your printer’s model and version of the firmware currently installed. Then, locate the latest firmware version available on the manufacturer’s website and download it onto your computer. Follow the instructions provided by the manufacturer to install the firmware update via USB or network connection to your printer. Keep in mind that updating the firmware can correct bugs and improve the printer’s overall performance.
Conclusion: Kyocera Printer Setup
Setting up a Kyocera printer can be a daunting task if not done correctly. However, following the instructions carefully can make the process seamless. In this article, we have provided a step-by-step guide to setup a Kyocera printer along with some important troubleshooting tips and resources.
Summary of the Setup Process
After unboxing the Kyocera printer, the user is required to connect the power cable and turn on the device. The printer must then be connected to the network via a LAN cable or Wi-Fi. The necessary drivers must be installed, and the printer must be added to the system. Finally, the user can start printing.
Importance of Following the Instructions Carefully
Following the setup instructions carefully is vital for a successful printer setup. Skipping a step or not connecting the printer to the network can cause severe issues that may require professional assistance. Additionally, using incorrect drivers or software can lead to poor print quality or even damage the device.
Troubleshooting Tips and Resources
Some common printer issues include paper jams, network errors and driver issues. Kyocera provides extensive resources, including documentation and support forums, to help solve these issues. Users can also contact the company’s customer support for further assistance.
In conclusion, setting up a Kyocera printer can be a hassle-free process if done correctly. Following instructions carefully, selecting the correct drivers and seeking the right resources when issues arise can help to keep the printer in excellent condition and output high-quality prints.